Cuisinart Deluxe Griddler Manual: A Comprehensive Guide
This comprehensive guide unlocks the full potential of your Cuisinart Griddler, offering detailed instructions and insights into its versatile functions, ensuring delightful cooking experiences․
Discover how to utilize its 5-in-1 capabilities – contact grill, panini press, full grill, full griddle, and half grill/half griddle – for superior performance․
Explore easy-to-follow steps for setup, operation, maintenance, and troubleshooting, alongside recommended cooking times and temperatures for perfect results every time․
Welcome to the world of versatile cooking with your Cuisinart Deluxe Griddler! This innovative appliance is designed to simplify meal preparation and expand your culinary horizons․ More than just a grill, the Griddler functions as a contact grill, panini press, full grill, full griddle, and even a half grill/half griddle – offering unparalleled flexibility in the kitchen․
This manual serves as your comprehensive guide, walking you through every aspect of your Griddler, from initial setup and operation to cleaning and maintenance․ Whether you’re a seasoned chef or a beginner cook, the Cuisinart Griddler empowers you to create delicious meals with ease and precision․
Prepare to explore a range of cooking possibilities, from perfectly grilled steaks and juicy burgers to golden-brown paninis and fluffy pancakes․ The Griddler’s superior performance and user-friendly design will quickly make it a staple in your kitchen․ Let’s get started on your culinary adventure!
Understanding the Griddler’s Features
The Cuisinart Deluxe Griddler boasts a remarkable array of features designed for optimal cooking performance and convenience․ Its core strength lies in its 5-in-1 functionality, seamlessly transitioning between a contact grill, panini press, full grill, full griddle, and a versatile half grill/half griddle configuration․
Removable, non-stick plates are a key highlight, facilitating effortless food release and simplifying the cleaning process․ The adjustable temperature control allows for precise cooking, catering to a wide variety of ingredients and recipes․ A sleek housing ensures durability and a stylish addition to any kitchen countertop․
Furthermore, the Griddler’s floating hinge accommodates varying food thicknesses, ensuring even contact and consistent results․ Its generous 11” x 9” cooking surface provides ample space for preparing meals for the entire family․ These features combine to deliver a truly exceptional cooking experience․
What’s Included in the Box?
Upon unboxing your Cuisinart Deluxe Griddler, you’ll find a comprehensive set of components designed to get you cooking immediately․ The primary inclusion is, of course, the Griddler unit itself, featuring its robust housing and integrated hinge mechanism․
You’ll receive a set of removable, non-stick griddle plates – typically one set configured for grilling and another for griddling․ A detailed instruction manual is also included, providing step-by-step guidance on operation, cleaning, and safety precautions․ Additionally, a recipe booklet offers inspiring culinary ideas to kickstart your Griddler journey․
Some models may also include a scraping tool to aid in plate cleaning, and potentially a brush for removing stubborn residue․ Ensure all listed components are present before proceeding with setup, guaranteeing a complete and satisfying experience․
Setting Up Your Griddler
Prepare for culinary adventures! This section guides you through unpacking, initial inspection, cleaning, and proper placement for optimal performance and longevity of your Griddler․
Unpacking and Initial Inspection
Carefully remove your Cuisinart Griddler from the packaging, ensuring all components are present․ Verify the unit itself, the removable plates (typically grill and griddle), the instruction manual, and any included accessories are accounted for․
Inspect the Griddler for any visible damage incurred during shipping․ Check for dents, scratches, or broken parts on the housing and plates․ If damage is detected, do not operate the appliance and immediately contact Cuisinart customer support for assistance․
Confirm the power cord is intact and free from any cuts or fraying․ Ensure the plates slide smoothly into their designated slots and lock securely․ Retain the original packaging for potential future transport or warranty claims․ A thorough initial inspection safeguards your investment and ensures a safe cooking experience․
Cleaning Before First Use
Before your inaugural cooking session, a meticulous cleaning process is essential․ Remove the plates and wash them with warm, soapy water․ Avoid abrasive cleaners, as they can damage the non-stick coating․ Rinse thoroughly and dry completely before re-inserting them into the Griddler․
Wipe down the appliance housing with a damp cloth․ Never immerse the main unit in water or any other liquid․ Ensure no water enters the control panel or heating elements․ A slightly damp cloth is sufficient for cleaning the exterior․
This initial cleaning removes any manufacturing residues or dust accumulated during storage and shipping․ It prepares the Griddler for optimal performance and ensures food safety․ A clean Griddler contributes to a healthier and more enjoyable cooking experience, preserving the appliance’s longevity․
Proper Placement and Ventilation
For safe and efficient operation, position your Cuisinart Griddler on a stable, heat-resistant surface․ Ensure ample space surrounds the unit – at least six inches on all sides – to allow for adequate ventilation․ Avoid placing it near flammable materials like curtains or paper towels․
Never operate the Griddler under cabinets or near walls that restrict airflow․ Restricted ventilation can lead to overheating and potentially damage the appliance․ Proper airflow is crucial for maintaining consistent cooking temperatures and preventing fire hazards․
Avoid using the Griddler on surfaces that are prone to heat damage․ A countertop protector or heat-resistant mat is recommended․ Always unplug the appliance when not in use and allow it to cool completely before storing․
Operating Instructions
Mastering your Cuisinart Griddler involves understanding its intuitive control panel, precise temperature settings, and versatile function modes for effortless cooking success․
Control Panel Overview
The Cuisinart Griddler’s control panel is designed for intuitive operation, featuring a straightforward layout to simplify your cooking process․ At its core, you’ll find the power button, initiating and terminating the griddler’s operation․ Adjacent to this is the temperature control dial, allowing precise adjustments for various recipes, ranging from gentle warming to high-heat searing․
A prominent selector knob governs the griddler’s function modes – Grill, Griddle, Panini, and more – enabling you to effortlessly switch between cooking styles․ Indicator lights clearly display the selected mode and when the unit is reaching or maintaining the desired temperature․ These lights provide visual confirmation, ensuring optimal cooking conditions․
Some models may include additional features like a timer function, allowing for pre-set cooking durations, and a digital display for enhanced precision․ Familiarizing yourself with these controls unlocks the full potential of your Cuisinart Griddler, guaranteeing consistently delicious results․
Temperature Control Settings
The Cuisinart Griddler’s temperature control is a crucial element for achieving perfectly cooked meals․ The dial typically spans a wide range, from a low “Warm” setting – ideal for keeping food at serving temperature – to a high heat suitable for searing steaks or grilling burgers․ Precise temperature management is key to preventing burning or undercooking․
Lower settings, around 200-300°F, are excellent for delicate foods like pancakes, eggs, or cheese melts․ Medium settings, 300-350°F, work well for chicken, fish, and vegetables․ Higher temperatures, exceeding 350°F, are best reserved for red meats and achieving a desirable char․
Experimentation is encouraged! Different foods require varying temperatures and cooking times․ Always consult recipes for specific guidance, and remember that thinner cuts generally require lower temperatures and shorter cooking durations than thicker ones․ Consistent monitoring ensures optimal results․
Griddler Function Modes (Grill, Griddle, Panini, etc․)
The Cuisinart Griddler’s versatility stems from its multiple function modes․ The ‘Grill’ mode utilizes the raised grill plates, creating those classic grill marks and channeling away excess fat for healthier cooking․ ‘Griddle’ mode employs flat plates, perfect for pancakes, bacon, or large surface area cooking․
‘Panini’ mode, achieved with the floating hinge, presses sandwiches to golden perfection․ The ‘Full Grill/Griddle’ option uses both plates in a single mode, maximizing cooking space․ Finally, the ‘Half Grill/Half Griddle’ setting offers the flexibility of cooking different foods simultaneously – grill chicken while griddling vegetables!
Selecting the appropriate mode is crucial for optimal results․ Each mode is designed to enhance specific cooking styles, ensuring even heat distribution and delicious outcomes․ Explore each function to unlock the Griddler’s full potential․

Cooking with Your Griddler
Embark on a culinary journey with your Cuisinart Griddler, utilizing recommended times and temperatures for optimal results, alongside exciting recipes for effortless meal preparation․
Recommended Cooking Times & Temperatures

Achieving perfectly cooked meals with your Cuisinart Griddler relies on understanding optimal cooking times and temperatures for various foods․ For steaks, a medium-rare cook typically requires 4-6 minutes at 400°F (200°C), while chicken breasts benefit from 6-8 minutes at 375°F (190°C)․
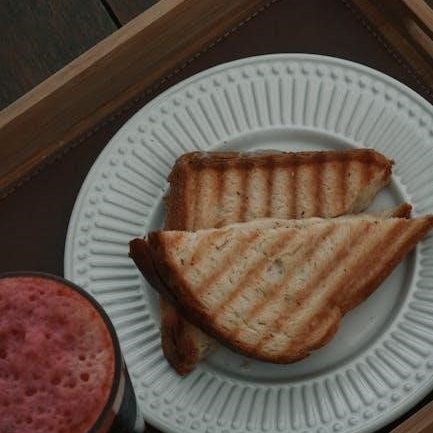
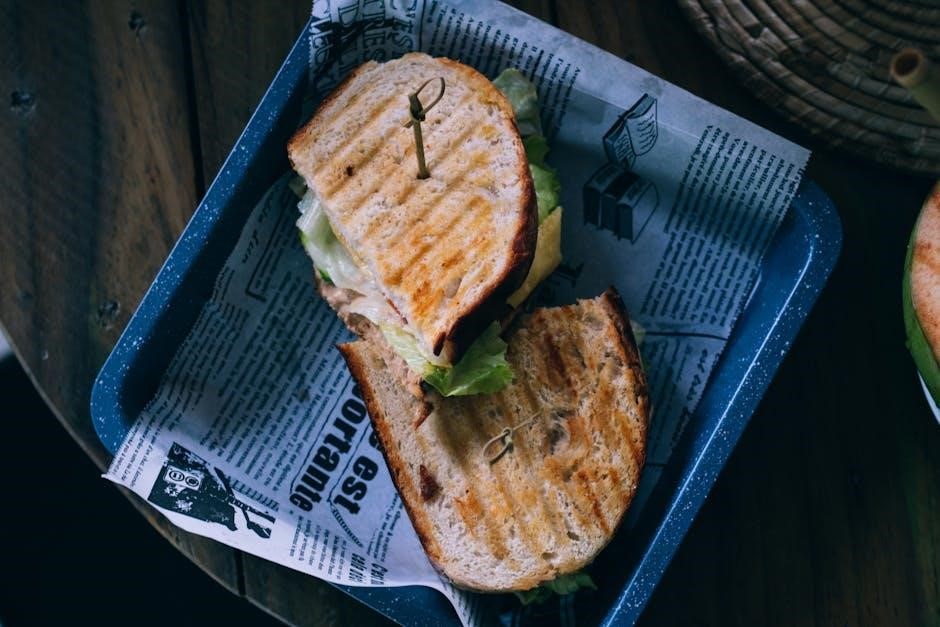
Paninis generally take 3-5 minutes at 350°F (175°C) for a golden-brown, melted cheese experience․ When grilling vegetables, aim for 5-7 minutes at 350°F (175°C) to retain their crispness and flavor․ Remember these are guidelines; adjust based on thickness and desired doneness․
Always use a meat thermometer to ensure internal temperatures reach safe levels․ For example, poultry should reach 165°F (74°C)․ Experimentation is key to mastering your Griddler and tailoring cooking times to your preferences; Consistent monitoring and slight adjustments will yield consistently delicious results․
Recipes for the Cuisinart Griddler
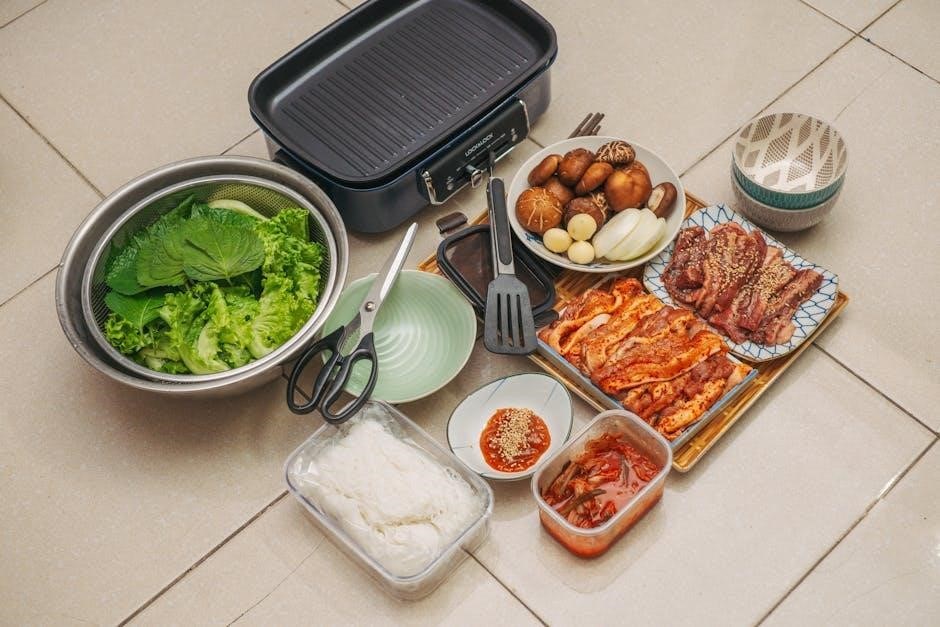
Unlock a world of culinary possibilities with your Cuisinart Griddler! Start with classic Panini: layer roasted turkey, Swiss cheese, and cranberry sauce on sourdough bread, grilling for 3-5 minutes․ For a quick dinner, try Grilled Chicken and Vegetables – marinate chicken breasts, then grill alongside sliced bell peppers and onions for 6-8 minutes․
Breakfast becomes a breeze with Griddler Pancakes: pour batter onto the hot surface and cook for 2-3 minutes per side․ Elevate your burgers by grilling patties to perfection in 4-6 minutes․ Explore endless options – quesadillas, grilled cheese, even pizza!
Don’t hesitate to experiment with marinades and seasonings to personalize your creations․ The Griddler’s versatility makes it ideal for both simple weeknight meals and impressive weekend brunches․
Tips for Perfect Results
Achieve consistently delicious meals with these helpful tips! Always preheat your Cuisinart Griddler for optimal cooking․ For even browning, avoid overcrowding the plates; work in batches if necessary․ Lightly oiling the plates before grilling prevents sticking and enhances flavor․
Utilize the adjustable temperature control to suit different ingredients – lower for delicate items like fish, higher for searing steaks․ Don’t press down too hard on the lid, allowing heat to circulate effectively․ Regularly check food for doneness, as cooking times vary․
Experiment with marinades and seasonings to elevate your dishes․ Remember to clean the plates after each use for optimal performance and longevity․ Enjoy exploring the Griddler’s capabilities!

Maintenance and Cleaning
Proper care ensures longevity․ Regularly remove and clean the removable plates, and wipe down the housing to maintain peak performance and hygiene․
Consistent cleaning prevents buildup and guarantees delicious results with every use of your versatile Cuisinart Griddler․
Removable Plate Removal and Installation
Safely removing and reinstalling the plates is crucial for effective cleaning and maintenance of your Cuisinart Griddler․ Ensure the unit is completely cooled and unplugged before beginning․ Gently lift the handle to the open position․ Locate the release buttons on either side of the plates; press these simultaneously to unlock them․
Carefully slide the plates forward, away from the unit, to remove them․ To reinstall, align the plates with the slots in the griddler base․ Slide them back into position until they click securely into place․ Verify they are firmly locked before use․ Avoid forcing the plates, as this could damage the locking mechanism․ Always handle the plates with care to prevent scratches or warping․ Proper installation ensures even heating and optimal cooking performance․
Regularly checking the plate alignment is recommended for consistent results․
Cleaning the Plates and Housing
Maintaining a clean Griddler is essential for food safety and longevity․ After each use, allow the unit to cool completely, then unplug it․ Removable plates can be hand-washed with warm, soapy water or placed in the dishwasher (top rack recommended)․ Avoid abrasive cleaners or scouring pads, which can damage the non-stick coating․
For stubborn residue, soak the plates in warm water before washing․ Wipe the housing with a damp cloth; never immerse it in water․ A mild detergent can be used for grease buildup․ Ensure no water enters the control panel or heating elements․ Dry all components thoroughly before reassembling or storing․ Regular cleaning prevents food buildup and ensures optimal performance․ Avoid using metal utensils directly on the plates to preserve the non-stick surface․
Inspect plates for damage regularly․
Storage Instructions
Proper storage extends the life of your Cuisinart Griddler․ Before storing, ensure the unit is completely cool, clean, and dry․ Store the Griddler in a cool, dry place, away from direct sunlight and moisture․ It’s best to store it on a flat, stable surface to prevent accidental falls or damage․
If storing for an extended period, consider storing the removable plates separately in a protective container to prevent scratches․ Avoid stacking heavy items on top of the Griddler, as this could damage the housing or control panel․ Keep the original packaging for safe storage and transport․ Ensure the power cord is neatly coiled and stored with the unit, avoiding any kinks or bends․ Regular checks during storage can help identify any potential issues before future use․
Protect from dust and pests․
Troubleshooting
This section provides solutions for common issues, clarifies error codes, and reinforces essential safety precautions for your Cuisinart Griddler, ensuring optimal performance․
Resolve problems quickly and safely with our comprehensive guide to keep your cooking experience seamless and enjoyable․
Common Issues and Solutions
Uneven Cooking: If food isn’t cooking evenly, ensure the griddler is on a level surface․ Also, avoid overcrowding the plates; cook in batches for consistent results․ Adjust temperature settings as needed, and verify proper contact between the plates and food․
Griddler Not Heating: Check the power cord connection and ensure the outlet is functioning correctly․ If the issue persists, the heating element might be faulty, requiring professional service․ Confirm the control panel is properly set․

Food Sticking to Plates: Lightly grease the plates before cooking, even with non-stick surfaces․ Allow the griddler to preheat fully before adding food․ Use appropriate utensils to avoid scratching the plates․
Smoke During Cooking: Excessive smoke often results from high-fat content foods․ Reduce the amount of oil used or choose leaner cuts of meat․ Ensure proper ventilation in the cooking area․
Control Panel Not Responding: Try resetting the griddler by unplugging it for a few minutes and then plugging it back in․ If the problem continues, contact Cuisinart customer support․
Error Codes and Their Meanings
E1: Temperature Sensor Error – Indicates a malfunction with the internal temperature sensor․ Disconnect the griddler, allow it to cool, and reconnect․ If the error persists, contact Cuisinart support for assistance․
E2: Heating Element Failure – Suggests a problem with the heating element․ Do not attempt to repair this yourself; professional service is required․ Unplug the unit immediately․
E3: Overheat Protection – The griddler has automatically shut off due to excessive temperature․ Allow it to cool completely before attempting to restart․ Ensure proper ventilation․
E4: Communication Error – A problem exists with the communication between the control panel and the internal components․ Reset the device by unplugging and replugging․
E5: Plate Detection Error – The griddler isn’t recognizing the plates are correctly installed․ Remove and securely reattach the plates, ensuring proper alignment․ If the error remains, contact support․
Safety Precautions
Always unplug the Cuisinart Griddler before cleaning or when not in use․ Never immerse the appliance in water or any other liquid to prevent electric shock․ Hot surfaces pose a burn risk; use oven mitts or tongs when handling plates or food during and immediately after cooking․
Ensure the appliance is placed on a stable, heat-resistant surface away from flammable materials․ Do not operate the griddler with a damaged cord or plug․ Supervise children closely when the appliance is in use․
Avoid using abrasive cleaners or scouring pads, as they can damage the non-stick coating․ Never attempt to repair the griddler yourself; contact authorized service personnel for repairs․ Proper ventilation is crucial during operation․
Do not operate the appliance outdoors․ Allow the unit to cool completely before storing․ Always follow the instructions outlined in this manual for safe and effective use․

Warranty Information
Cuisinart provides a limited warranty covering defects in materials and workmanship․ Contact customer support for details, registration, and to initiate any warranty claims promptly․
This warranty ensures peace of mind, protecting your investment in this versatile kitchen appliance for a specified period․
Cuisinart Warranty Details
Cuisinart stands behind the quality of its products, offering a limited warranty on the Deluxe Griddler․ This warranty typically covers defects in materials and workmanship under normal household use for a period of three years from the date of original purchase․
The warranty does not cover damage resulting from misuse, accidents, unauthorized repairs, or normal wear and tear․ It also excludes any consequential or incidental damages․ To make a warranty claim, you must provide proof of purchase, such as a receipt or gift registration․
Cuisinart, at its discretion, will either repair the defective product, replace it with a new or refurbished unit, or refund the purchase price․ Shipping costs to and from the Cuisinart service center are the responsibility of the consumer․ This warranty gives you specific legal rights, and you may have other rights that vary by location․
Always register your product online to expedite any future warranty service requests․
Contacting Customer Support
Should you require assistance with your Cuisinart Deluxe Griddler, several avenues are available to reach their dedicated customer support team․ You can visit the official Cuisinart website, which features a comprehensive FAQ section, troubleshooting guides, and downloadable manuals․
For direct assistance, you can contact Cuisinart via phone during their business hours; Their toll-free number is readily available on their website․ Alternatively, email support is offered, allowing you to submit detailed inquiries and receive personalized responses․
Cuisinart also maintains an active presence on social media platforms, providing another channel for quick questions and updates․ When contacting support, have your model number and proof of purchase readily available to expedite the process․ Expect knowledgeable representatives eager to resolve your concerns efficiently․
Their commitment is to ensure your complete satisfaction․